New display
We have listened to you one more time, so every contact will be displayed by using a new layout that provides a better user experience.
This new display allows agents to go through all the information available for a specific contact by simply scrolling up and down. This means you won’t have to click on different tabs to look up the details of one single contact.
Additionally, we have added relevant activity information that will allow agents to make better decisions.
Invite area
If a specific contact hasn’t downloaded the mobile app yet, you will see a blue component at the top of the page where you can select the way you want to invite your contact.

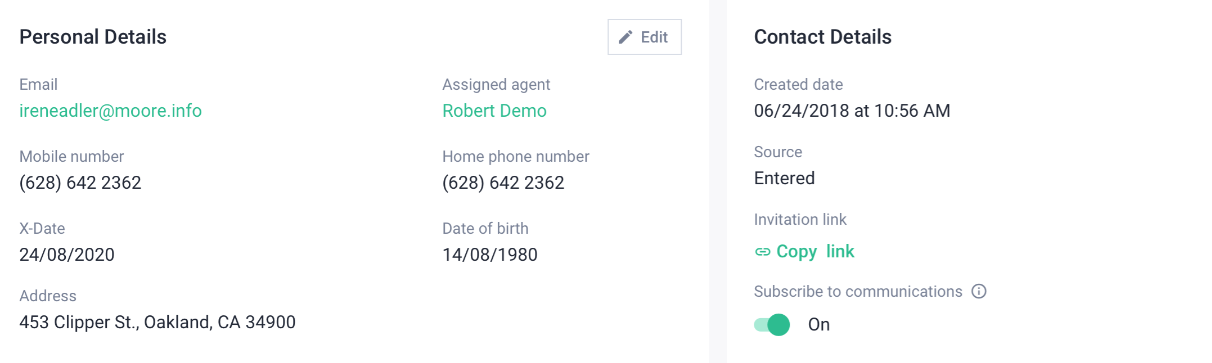
Personal and contact details
The top area also displays the personal information of the contact such as name, address, email, and so on. Please note you will only see the contact details available at that moment. If you wish to add or update the existing details, please click the Edit button.
Edit mode
Once you click the Edit button, a form with the contact details will be displayed on screen. This form allows agents to add or update details of a specific contact. You only need to enter the new details or update the existing ones before clicking the Save button.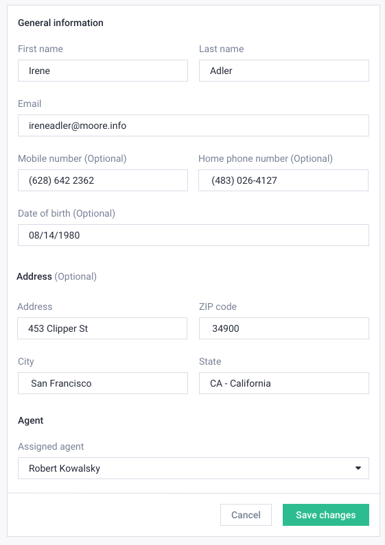
Note: this option is not available for contacts imported from your AMS
Policies information
Here you can review the existing policy information. By clicking on a specific policy, you will access the policy detail page where all the policy information is available.
We’re sure that you will find very useful to find the annual premium amount in the top-right corner of this component.
Need to add a policy? No problem! You can add any policy type to any contact by clicking on the Create call to action next to the Policies label.

Opportunities
Here you can review the opportunities available for a specific contact. By clicking on a specific opportunity, you can access the opportunity detail page where all the opportunity information is available.
You can add opportunities to the contact by clicking the Create call to action next to the Opportunities label.

Send email
Of course, you can email a specific user by clicking on the top Email button. We wanted to facilitate communication with all your contacts, so we have fixed this element to the top area, so it’s always at hand.
If the user has decided to unsubscribe from communications or there’s no email available, then the Email button will be displayed disabled.

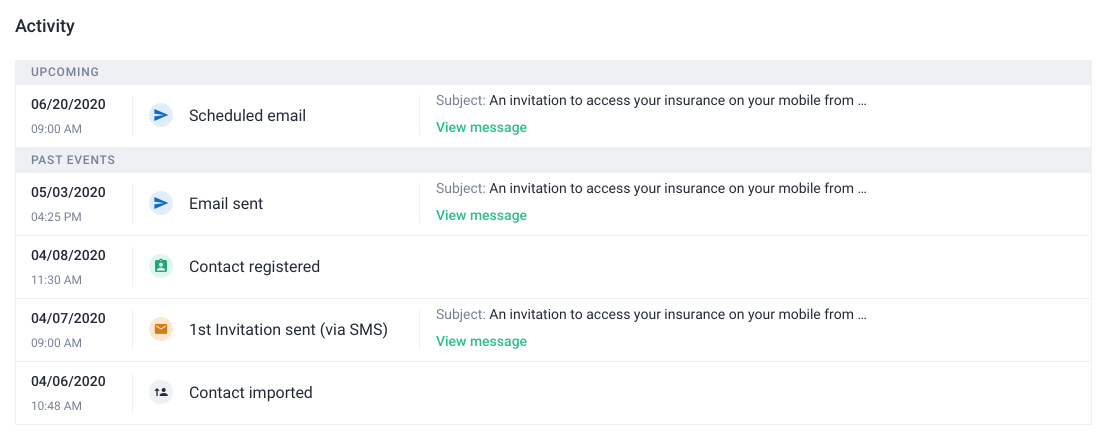
Activity
Now you can review all the activity of a specific contact since it was imported into Agentero. From the import date to emails sent or app invitations, everything is available in this module.
More details of every activity are available by clicking on the View links.